Electricity meters
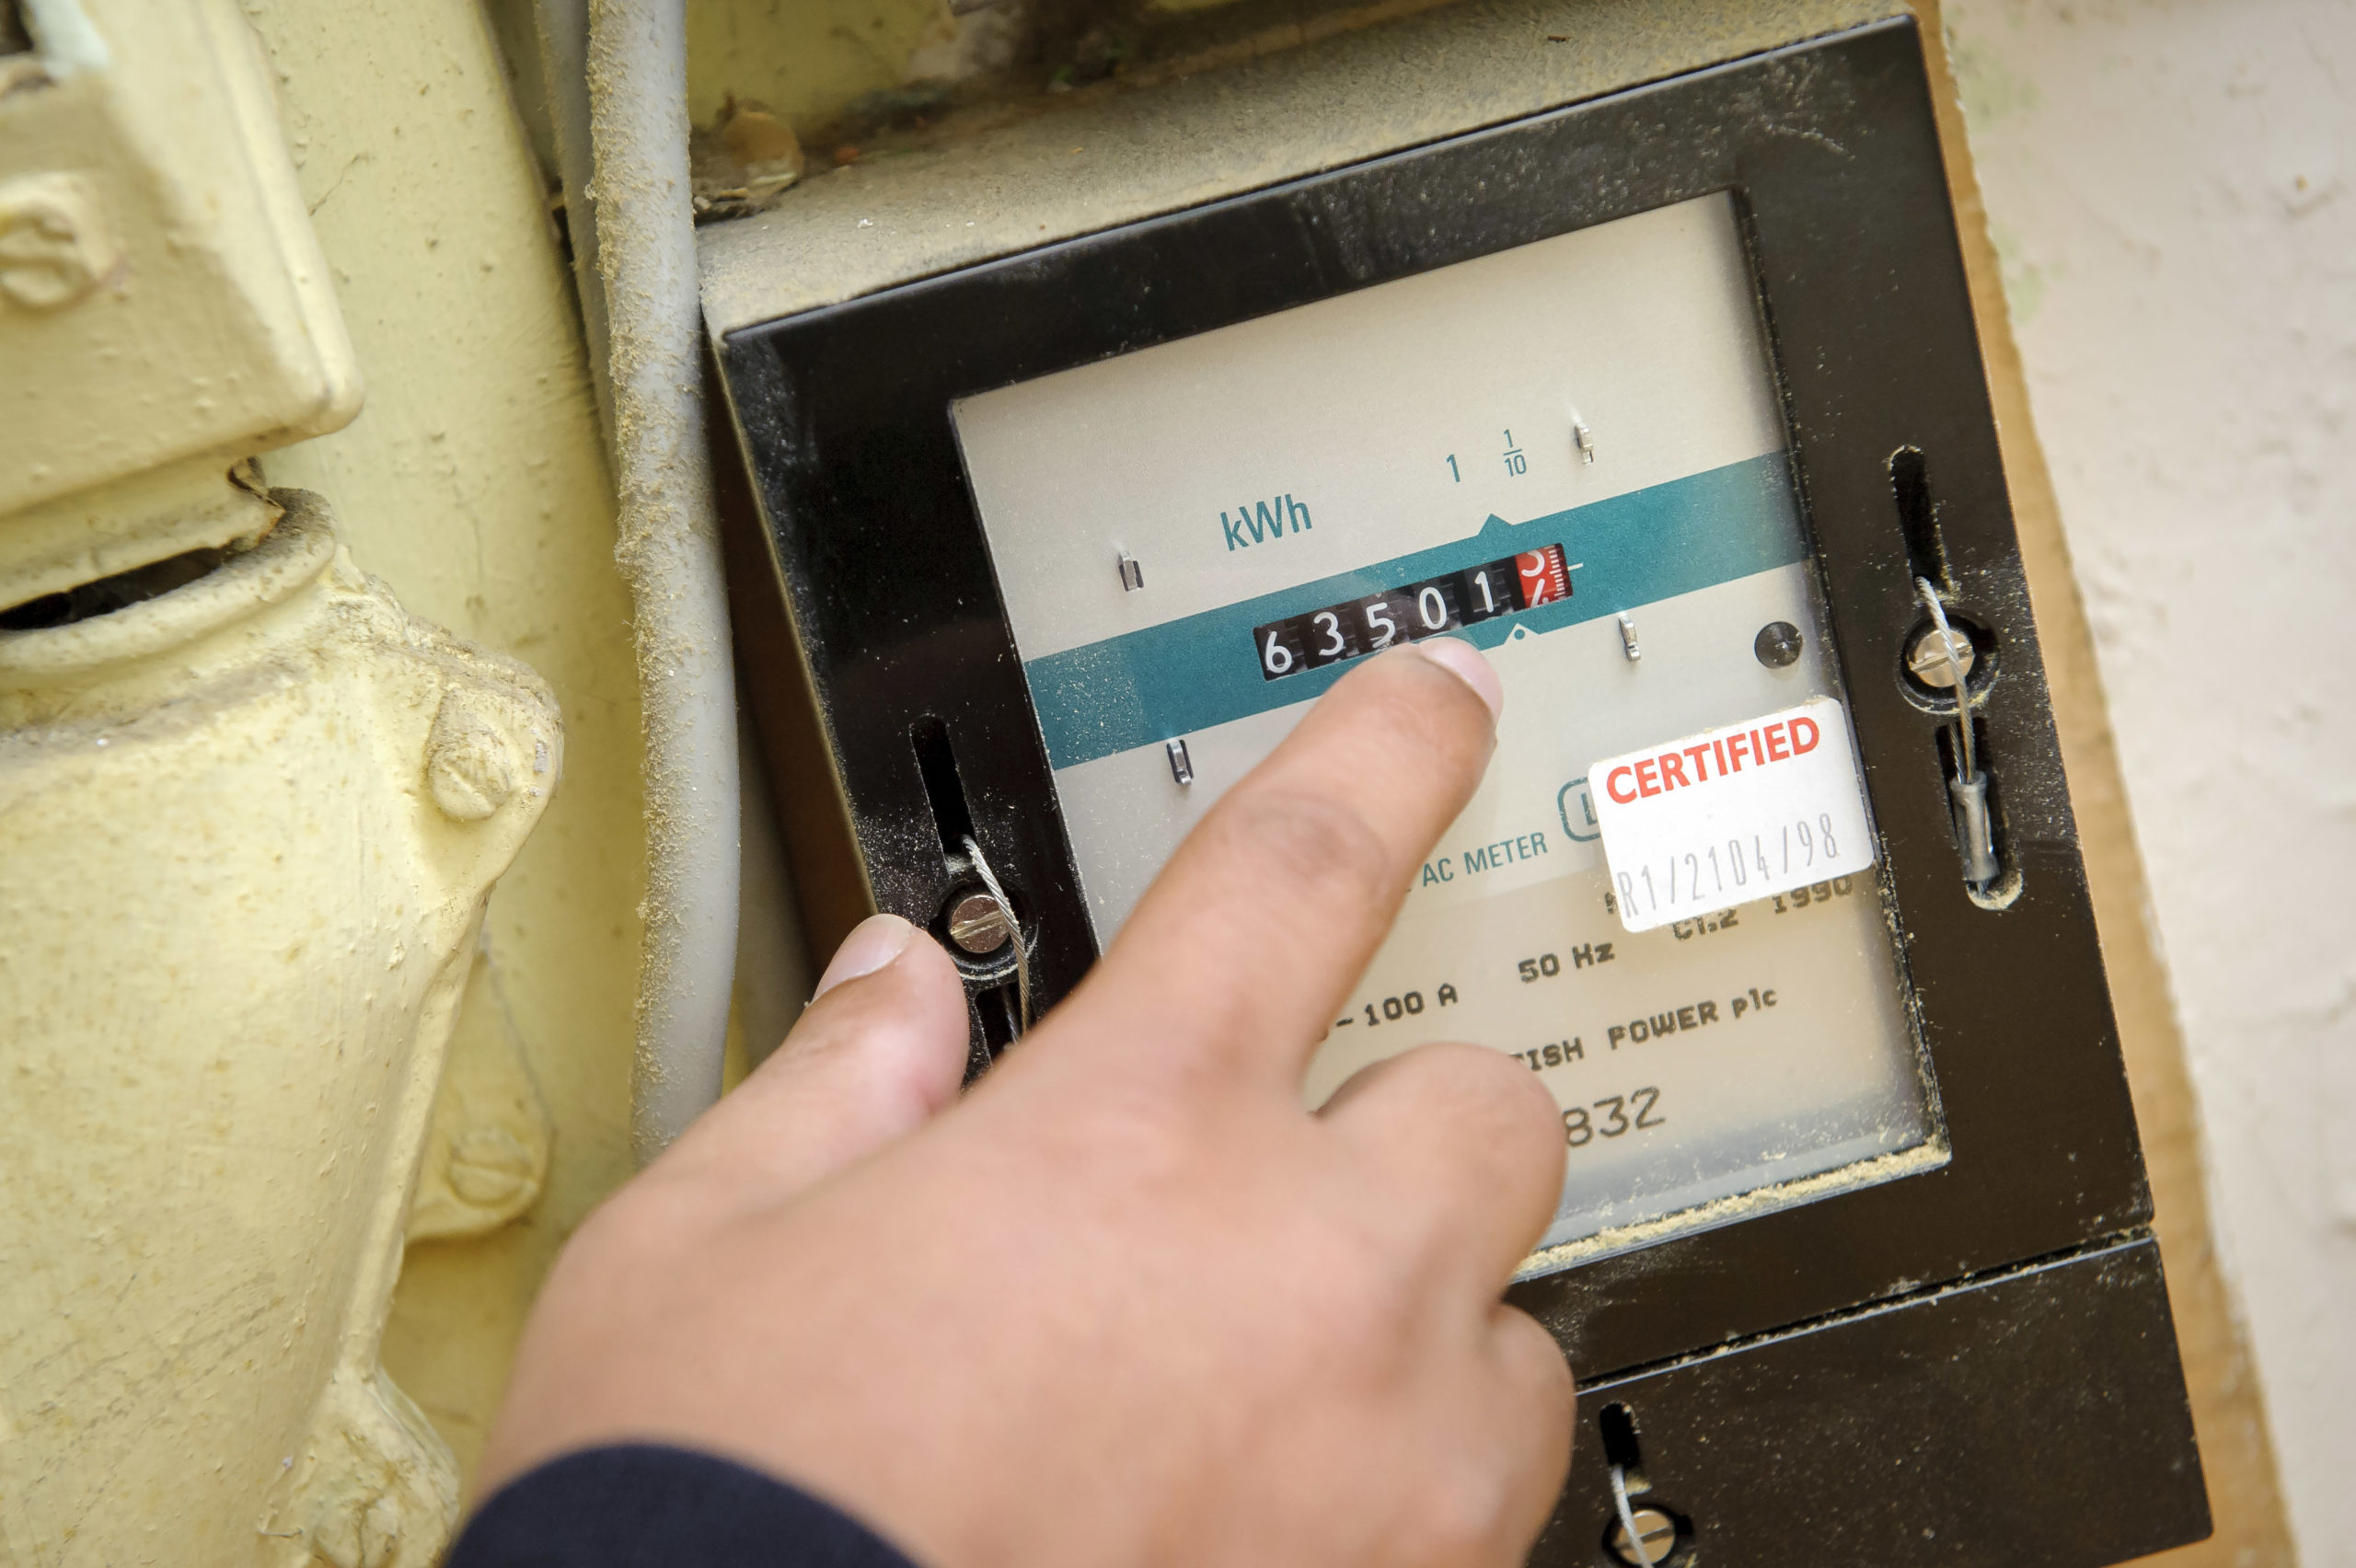
An electricity meter keeps track of the electricity usage in our homes.
All electricity meters have a display to show how much electricity you’ve used. The number on the display is called the ‘meter reading.’ Your energy supplier needs to receive regular meter readings to get your bill right.
Your energy supplier gets a meter reading when:
- You read the meter and let them know the number
- Someone from your supplier is sent to your home to read your meter
- You have a smart meter which sends readings to your supplier for you
Where is my electricity meter?
It’s not always easy to find an electricity meter. You’re looking for a boxy piece of equipment which has a display like those shown in the sections below.
Your meter could be:
- Near the boiler
- In a store cupboard
- In a kitchen cupboard
- In a garage
- In a basement
If you live in a flat, everyone’s meters are sometimes placed together. Your block might have a meter room, usually found on the ground floor. Each meter should be labelled to show which flat it belongs to.
Your electricity meter could also be outside your property. Some meters are placed in a utility box on an outside wall.
How to read your electricity meter
There are different kinds of electricity meter displays. We’ll help you read the most common types below.
Single rate standard electricity meter
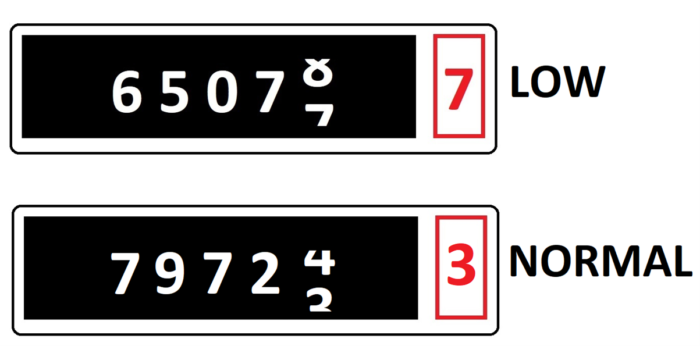
Like the old milometers in cars, the numbers on a standard display literally “go up”. As electricity is used, the numbers increase. You can see on the display below that the seven has almost turned to eight.
To read the meter, simply write down the white numbers from left to right. You don’t need to report the red one. For the last white number, write down the number you can see most of in the display. If in doubt, choose the lower number.
The meter reading in this case is 65077.

Two rate standard electricity meter
If you are on a tariff where you pay less for electricity at certain times of the day (e.g. Economy 7), you may have two displays on your meter.
The top row (labelled “low”) is the amount of electricity you’ve used at the cheaper rate. The bottom row (labelled “normal”) is the amount of electricity you’ve used at the more expensive rate.
Write down both numbers. Make sure not to get them mixed up.
In this case, the meter reading is:
65077 at the low rate
79723 at the normal rate.
Single rate digital electricity meter
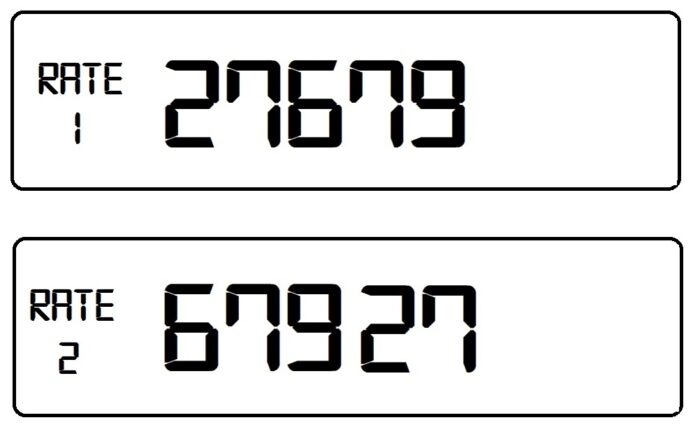
Your meter may have a screen which shows the reading digitally. The display will look similar to the screen on a digital alarm clock.
To read the meter, simply write down the number from left to right.
In this case, the meter reading is 27679.

Two rate digital electricity meter
If you are on a tariff where electricity is cheaper during the night (e.g. Economy 7) you may have two displays on your meter.
It’s also possible you might have this type of tariff but only one display. You should be able to press a button on the meter to switch between the Rate 1 and Rate 2 reading.
Write down both numbers. Make sure you don’t mix them up.
In this case, the meter reading is:
Rate 1 = 27679
Rate 2 = 67927
Electricity dial meter
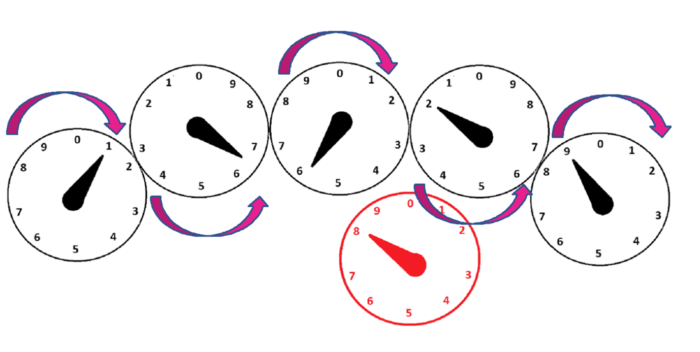
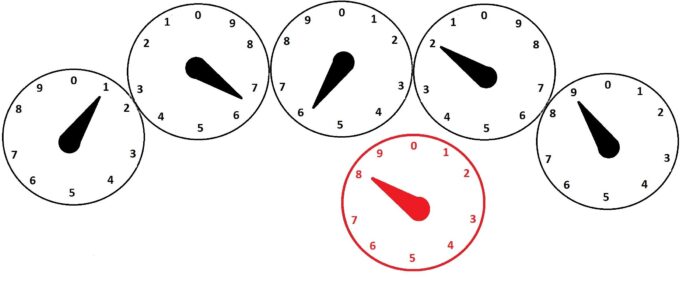
Some meters have dials which look similar to clocks. You’ll need to read each dial in turn. You can ignore the red one.
- Read the dials from left to right.
- The numbers on each dial will run either clockwise or anti-clockwise.
- If the pointer is between two numbers, write down the smaller number. If the pointer is between 0 and 9, write down 9.
- For any dials where the pointer is pointing straight at a number, underline the number you write down. Ignore this rule if the number is a 9.
- When you’ve written down numbers for all five dials, look at any numbers you’ve underlined. If any of the underlined numbers are followed by a 9, take away one from the underlined number.
Don’t worry if this sounds complicated – we’ll go through the reading step by step for the dial meter shown above.
Starting left to right:
- The pointer is directly on 1, so we write down 1 and underline it: 1
- The pointer is between 6 and 7, so we write down 6 because it’s the lower number: 1 6
- The pointer is between 5 and 6, so we write down 5: 1 6 5
- The pointer is directly on 2, so we write down 2 and underline it: 1 6 5 2
- On the last dial, the pointer is at 9. We write down 9 but don’t underline it. Remember: the underlining rule doesn’t apply to 9s: 1 6 5 2 9
- We now check the numbers we’ve underlined
- The first underlined number we have is 1. It’s followed by a 6. So we leave the reading of 1 as it is
- The only other underlined number we have is 2. It’s followed by a 9. This means we take away 1 from the 2: 2-1=1.
- This leaves us with our final reading to send to our supplier: 1 6 5 1 9
Useful pages
Is this page useful?